Disclaimer: There are affiliate links in this post. At no cost to you, I get commissions for purchases made through links in this post.
If your kitchen sink faucet is loose or starts to drip, it may be time to tighten it. This is a relatively easy process that anyone can do with just a few simple tools. In this article, we’ll show you how to tighten a kitchen faucet in just a few minutes.
First, you’ll need to identify the problem area. If the faucet is loose at the base, you’ll need to tighten the mounting nuts. If the issue is with the handle, you’ll need to tighten the set screw.
Once you’ve located the problem area, simply use a wrench to tighten the nuts or set screw as needed. Be sure not to overtighten, as this could damage the faucet.
With just a few minutes of work, you can easily tighten a kitchen faucet and stop any leaks or drips.
What Is It Inside That Causes The Valve Not To Close All The Way?
The most common reason for a valve not to close all the way is because there is something inside the valve that is preventing it from closing properly. This could be anything from a piece of debris to a build-up of sediment or scale. If you have a valve that isn’t closing all the way, the first thing you should do is check to see if there is anything blocking the path of the closure mechanism. If there is, then you will need to remove whatever it is before the valve closes properly again.
Another possibility is that the closure mechanism itself is damaged or broken. This is often the case with older valves, which may need to be replaced if the problem can’t be fixed. In some cases, it may also be necessary to replace the entire valve if it’s too old or damaged to be repaired.
If you’re not sure what’s causing your valve not to close all the way, it’s always best to consult a professional. A plumber or other qualified technician will be able to diagnose the problem and recommend the best course of action to take. They may also be able to provide you with a replacement valve if necessary.
No matter what the cause, a valve that isn’t closing all the way can be a serious problem. If you suspect that there is an issue with your valve, be sure to contact a professional as soon as possible. They’ll be able to help you get to the bottom of the problem and ensure that your valve is working properly again in no time.
Why Should You Tighten Kitchen Faucet?
One of the most commonly used fixtures in the kitchen is the faucet. Over time, however, even the best quality faucets can become loose, making them difficult to use. If your kitchen faucet has become loose, it’s important to tighten it as soon as possible. Here are four reasons why:
1. Loose faucets can lead to water leaks.
If your faucet isn’t tightened properly, it can begin to leak. Even a small leak can waste a lot of water over time and increase your water bill. In addition, water leaks can damage your countertops and floors.
2. Loose faucets can be dangerous.
A loose faucet can be a safety hazard. If the faucet is in the sink, a leak can cause slippery floors. In addition, loose faucets can be difficult to turn off, which can lead to scalding or burns.
3. Loose faucets can be hard to use.
A loose faucet is more difficult to use than a tight one. It can be difficult to get a steady stream of water from a loose faucet, and it may take longer to fill up pots and pans.
4. Loose faucets can be annoying.
A loose faucet can make everyday tasks more difficult and frustrating. If you’re constantly having to adjust a loose faucet, it can make cooking and cleaning much less enjoyable.
Tightening a loose kitchen faucet is a simple process that can be done in just a few minutes. With a few tools, you can have your faucet working properly again in no time. So, if your kitchen faucet is loose, don’t wait to fix it. Tighten it up and enjoy using your kitchen again.
How To Tighten Kitchen Faucet
It is important to keep your kitchen faucet in good working condition. Over time, the faucet may become loose and need to be tightened. This is a simple process that anyone can do with a few tools.
To tighten a kitchen faucet, you will need:
- A Phillips head screwdriver
- A flat head screwdriver
- A pair of pliers
- A rag
Instruction
First, turn off the water supply to the faucet. Next, use a Phillips head screwdriver to remove the screws that hold the handle in place. Be careful not to strip the screws. If they are stripped, you will need to replace them before proceeding.
Once the screws are removed, the handle should come off easily. If it does not, you may need to use a flat head screwdriver to pry it off. Be careful not to damage the finish on the faucet.
Once the handle is off, you will see a metal sleeve that goes over the valve stem. Use a pair of pliers to remove this sleeve.
Underneath the sleeve, there is a nut that holds the valve stem in place. Use the pliers to loosen this nut until it is hand tight. Do not completely remove the nut, as you will need to re-tighten it later.
Now, turn on the water supply and check for leaks. If there are any leaks, tighten the nut until they stop. Once the leaks have stopped, turn off the water and replace the metal sleeve and handle. Screw the handle back in place using the Phillips head screwdriver.
That’s all there is to it! By following these simple steps, you can easily tighten a loose kitchen faucet.
Tips On Tightening Kitchen Faucet
If your kitchen faucet is loose, it can be a real nuisance. Not only will it make it difficult to use the faucet, but it can also cause water to leak out. Thankfully, there are a few easy tips that you can follow to tighten your kitchen faucet and stop the leaks.
The first thing that you need to do is turn off the water supply to your kitchen sink. This will help to prevent any further damage from occurring. Once the water supply is shut off, look at the base of the faucet. If you see any screws that are loose, tighten them up using a screwdriver.
If there are no screws that are loose, then you will need to remove the handle of the faucet. To do this, you will need to use a wrench. Once the handle is removed, you should be able to see a nut that is holding the faucet in place. Use the wrench to loosen this nut and then remove it completely.
Once the nut is removed, you should be able to pull the faucet out of the sink. Look at the O-ring that is located on the end of the faucet. If this O-ring is damaged, it could cause your kitchen faucet to leak. You can purchase a replacement O-ring at most hardware stores.
To install the new O-ring, simply place it on the end of the faucet and then screw the nut back in place. Once the nut is tightened, you can then replace the handle of the kitchen faucet. Turn on the water supply and check for any leaks. If there are no leaks, your kitchen faucet should now be functioning properly.
How To Tighten Kitchen Faucet Nut Under Sink
If your kitchen faucet is loose or leaks, you may need to tighten the nut under the sink. This is a simple process that anyone can do with a few tools.
What You’ll Need:
- Wrench or pliers
- Rag
Instructions:
- Locate the nut under the sink. It will be attached to the base of the faucet.
- Use a wrench or pliers to tighten the nut. Be careful not to overtighten it, as this could damage the faucet.
- Test the faucet to see if it is still leaking. If it is, you may need to replace the washer.
- Once the faucet is no longer leaking, wipe up any water that has spilled with a rag.
Tips:
- If you can’t find the nut under the sink, check behind the Escutcheon plate.
- If your faucet still leaks after tightening the nut, you may need to replace the washer. Washers can be found at most hardware stores.
- If you’re having trouble tightening the nut, try using a pipe wrench.
How To Tighten Kitchen Faucet Handle
If your kitchen faucet handle is loose, it can be annoying and even dangerous. A loose handle can cause water to leak out, which can damage your countertop or floor. It can also make it difficult to control the water flow, leading to splatters and spills.
Fortunately, tightening a loose kitchen faucet handle is relatively easy to do. In most cases, you won’t need any special tools. Just follow these simple steps:
- Turn off the water supply to your faucet. This is usually done by turning a knob under the sink.
- Use a wrench or other tool to remove the decorative cap from the top of the handle.
- Use a screwdriver to remove the screw that holds the handle in place.
- Tighten the screw with your screwdriver.
- Replace the decorative cap and turn on the water supply.
If your kitchen faucet handle is still loose after following these steps, you may need to replace the entire handle. This is a more complex repair that should be done by a professional.
How To Tighten Kitchen Faucet - FAQs
Use a wrench to tighten the kitchen faucet. If the kitchen faucet is loose, it may be due to a problem with the washer or O-ring. To fix this, simply replace the washer or O-ring.
If your kitchen faucet is leaking, it is likely that the problem is with a loose washer or O-ring. To check if this is the problem, remove the washer or O-ring and inspect it for wear. If it is damaged, simply replace it.
The most common cause of a loose kitchen faucet is a problem with the washer or O-ring. Another common cause is improper installation. If the kitchen faucet was not installed correctly, it may become loose over time.
To prevent your kitchen faucet from becoming loose, make sure that it is installed correctly. Also, check the washer or O-ring regularly for wear and replace it if it is damaged.
The best way to tighten a kitchen faucet is to use a wrench. Place the wrench over the hexagonal base of the faucet and turn it clockwise until it is tight.
There are a few ways that you can tighten a kitchen faucet, but the best way is to use a wrench. You can also use pliers, but they may not be as effective.
There are a few reasons why your kitchen faucet may be leaking. It could be because the washer is worn out or it could be because the O-ring is damaged. If you’re not sure what the problem is, you can always call a plumber to look at it.
You should replace your kitchen faucet every 5-7 years. If you have a higher quality faucet, you may be able to get away with replacing it less often.
If your kitchen faucet is leaking, that’s a pretty good sign that you need to replace it. Other signs include rusting or damage to the finish.
It’s not necessary to hire a professional to install your new kitchen faucet, but it might not hurt. If you’re not comfortable doing it yourself, then it might be best to leave it to the professionals.
Conclusion
Now that you know how to tighten a kitchen faucet, you can keep it in good working condition for many years to come. By regularly checking the condition of your faucet and taking care of any potential problems, you can avoid costly repairs or replacements down the road. So don’t delay, get your kitchen faucet in tip-top shape today!
Related Posts
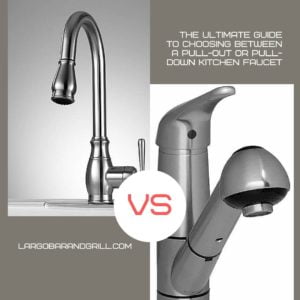
The Ultimate Guide to Choosing Between a Pull-out or Pull-down Kitchen Faucet
Disclaimer: There are affiliate links in this post. At no...
Read More
Best Pull-Down Kitchen Faucet: A Complete Review Of Top Rated Models
Disclaimer: There are affiliate links in this post. At no...
Read More
How To Choose The Best Touchless Kitchen Faucets For Your Needs
Disclaimer: There are affiliate links in this post. At no...
Read MoreWhy Trust Us
You will find what you are looking for at Largo Bar and Grill. From classic to luxury brands, you'll find both. We will help you to select appliances that fit your needs, budget and lifestyle. Whether you want to stop by to learn more — or plan to make a major purchase — we’ll treat you like family and assist you every step of the way. Shop with us today to receive friendly and experienced help along the way.